

Link to the MRI website
July 20, 2020 – Scanner Center Now Open
The scanner center is now open for research groups who have an approved “Lab Re-Population Plan”. For detailed information on scanning in the time of covid, go to the Forms page to find the new “COVID-19 Safety Manual” and the “COVID-19 Screening Checklist”.
Personal protection equipment and a sign-in sheet are found immediately to the left of the control room door. If there are any questions, or problems accessing the building, don’t hesitate to email msereno@sdsu.edu or smolnar@sdsu.edu.
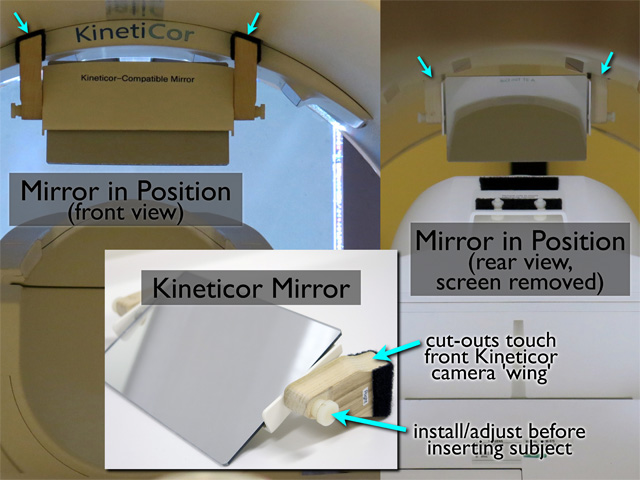
October 15, 2019 – Kineticor-Compatible Mirror
The Kineticor-compatible mirror is stored in the Kineticor cabinet (top left), behind the nose markers. It allows all 4 cameras to see the nose markers. For rear projection, it should be installed and adjusted by the experimenter before inserting the subject (it easily clears the head coil/subject). It is velcro’ed to the top of the bore with the rounded cut-outs in the wooden supports touching the front of the Kineticor camera ‘wing’.
April 25, 2019 – 20-Channel Air Puffer Installed
The 20-channel somatosensory stimulation system using air puffs has been installed!
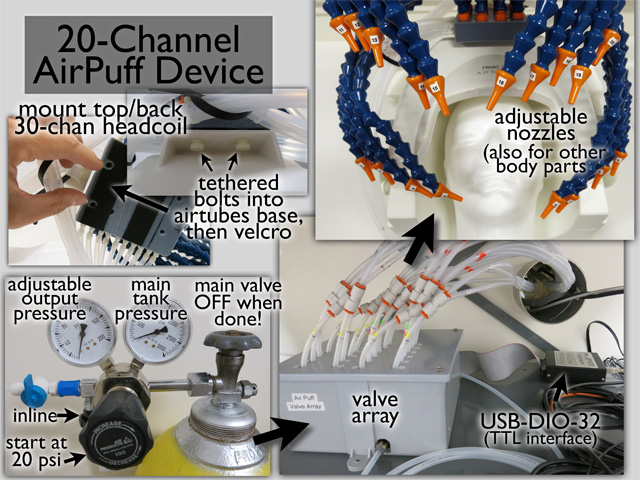
The valves in this system are driven by 20 TTL lines. Currently, these are connected to a USB-DIO-32 box that converts USB to 32 bits of TTL I/O. There are Windows and Mac drivers for this system (e.g., to use from MATLAB), or the user can directly attach TTL-level signals (e.g., from a National Instruments box).
The array of air tubes can be anchored to the back end of the 30-channel coil with two tethered nylon bolts, then velcroed. The base can also be attached to board with two other nylon bolts for stimulating other body parts. The air tubes are driven by a compressed air cylinder to the left of the room door.
Minimal HOWTO:
(1) Turn delivered pressure OFF: N.B.: unscrew (CCW) large black knob
(2) Turn main cylinder ON: unscrew (CCW) top valve
(3) Check main cylinder pressure (right gauge) (full cylinder: 2200 psi)
(4) Set 20 psi (left gauge) delivered w/large black knob (N.B.: screw in to increase)
(5) open final black in-line valve
(6) set up TTL valve control
When done, reverse procedure (be sure to finish with main valve OFF!)
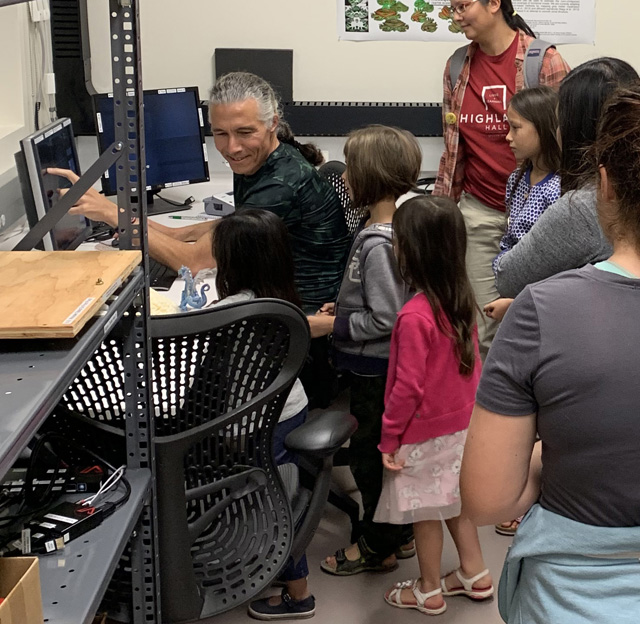
March 23, 2019 – Science Sampler Day at the MRI center
On Saturday, March 23, the MRI center hosted interested guests for Science Sampler Day, part of Explore SDSU Day.
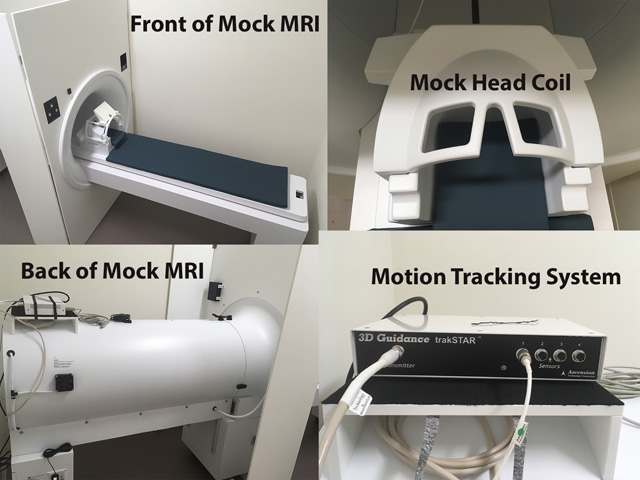
March 21, 2019 – MRI Simulator Installed
Our mock scanner has arrived and is nearly ready to use. The MoTrak software will soon be installed on a PC, which will also drive a second LCD display inside the mock scanner that can display MoTrak subject feedback as well as researcher-specific practice stimulus paradigms.
February 12, 2019 – OptoAcoustics Headphones/Microphone Installed
The OptoAcoustics headphone/microphone system has been installed!
This system is parallel to the Siemens intercom, which still works. You can continue to use the Siemens system if you prefer. The OptoAcoustics system consists of a noise-cancelling microphone, a pair of slim, noise-cancelling earphone units that fit into both 32- and 64-channel coils, and slim inflatable outer pillows that slip in between the headphones and head coil to evenly hold the headphones in place.
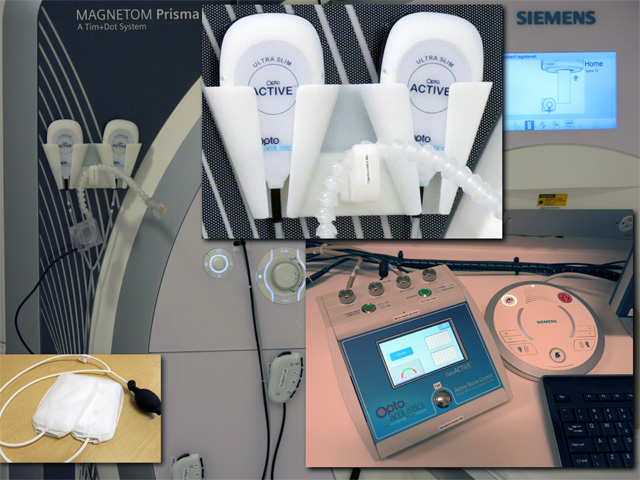
The gooseneck microphone (double optical microphone) permits recording completely un-artifacted vocal responses during scans and provides extremely clear subject feedback. In contrast to the Siemens intercom, the EPI beeps are completely suppressed, allowing you to even hear the subject whispering during a scan. It’s worth telling subjects not to yell. The headphones have piezoelectric drivers and each contains another optical microphone for noise cancellation, but also for recording exactly what the subject is hearing and for setting absolute stimulus sound pressure levels (visible on OptoAcoustics console). The OptoAcoustics feedback speaker can be switched between the subject microphone (what the subject is saying — default: button out) and the headphone microphone (what the subject is hearing).
Remember that scanner noise gets into your ears via two paths. The first is through the outer ear into the ear canal. The second is via ‘bone conduction’ directly into the inner ear (vibration of the head in contact with the head coil, sound in the air entering the body and being transmitted to the inner ear). Noise cancelling earphones (and ear plugs) can only cancel noise coming into the ear canal, but not noise entering via ‘bone-conduction’. The noise-cancellation performance of the OptoAcoustics system is comparable to very-well-seated ear plugs. But then they make it possible to deliver high quality auditory stimuli with very easy setup.
The OptoAcoustics system uses an initial 16 sec period (after the first scanner pulse) to ‘learn’ the spectrum of the repeated noise. During this time, no audio stimulus should be presented. In order to obtain enough samples, the TR (repeated scanner sound) must be less than 3.6 sec. During this initial period, there is no noise cancellation. However, the sealed headphones themselves provide good attentuation of the scanner noise.
The audio input to the system is via a 3.5mm stereo headphone jack (LINE1) on the back of the OptoAcoustics control unit (in laptop cable bundle on desktop). An optical audio input is also accepted (LINE2). The noise-cancelled output of the microphone can be recorded along with the scanner trigger pulse via a stereo USB audio connection to the OptoAcoustics control unit. The stereo audio signal heard by the subject (after noise cancellation) can be recorded via the green analog stereo 3.5mm jack on front of the PC-like box under the desk.
Finally, the microphone signal can be fed back into the headphones to enable more naturalistic speaking (Self-Hearing dial).
Minimal HOWTO:
(1) Turn on OptoAcoustic desktop unit (back panel)
(2) “Start” (touchscreen)
(3) Setup mic/headphones/inflate-pads, move patient table in
(4) “Calibrate” (touchscreen, soft ‘whoosh’ in each ear)
(5) “Learn” (touchscreen => waits for scanner pulses)
(6) Start scan (noise cancellation starts 16s after 1st scanner pulse)
(7) Start soundtrack (16s after first scanner pulse)
October 25, 2017 — Magnet Installation In Progress
The magnet installation is well along. The shielded room has been completed and tested, and the magnet successfully ramped up and down. The EIS building remains on schedule to be opened for initial move-in in December.
 Magnet inside completed shielded room
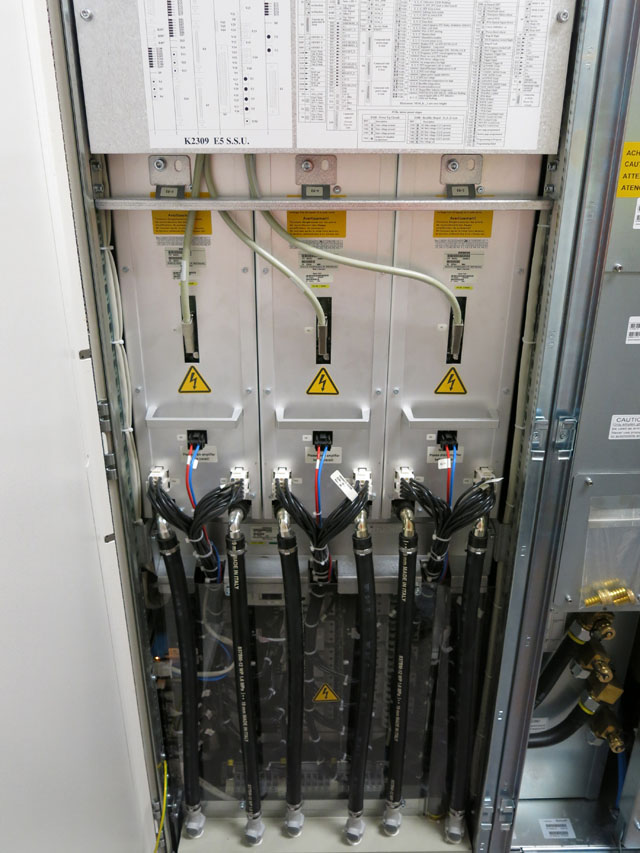 Our three one-million-watt water-cooled gradient amplifiers
 Our minus 452 degrees Fahrenheit fridge (4 deg Kelvin)
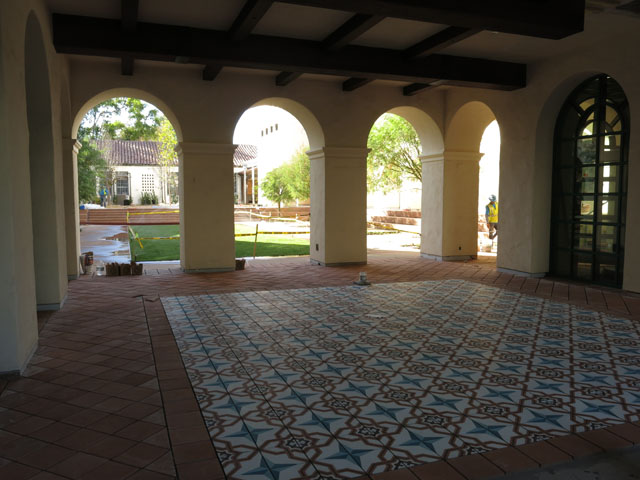
Courtyard tiles ready to grout
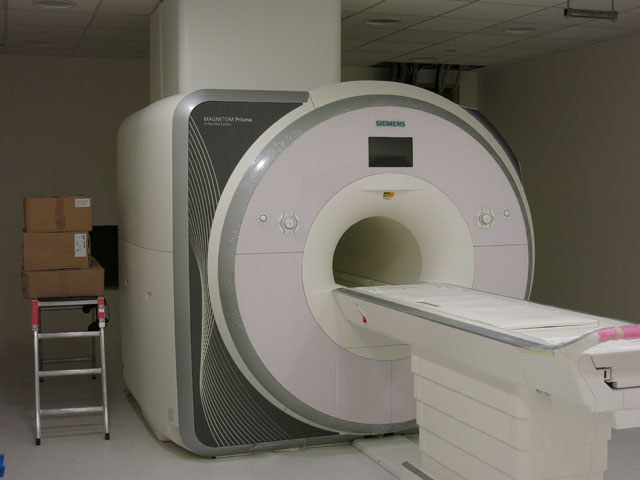
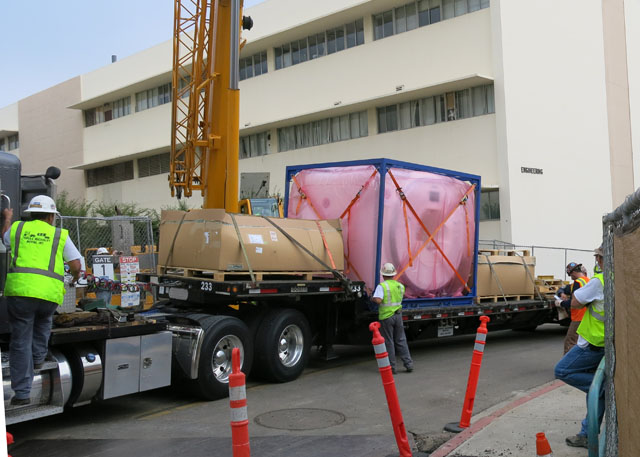
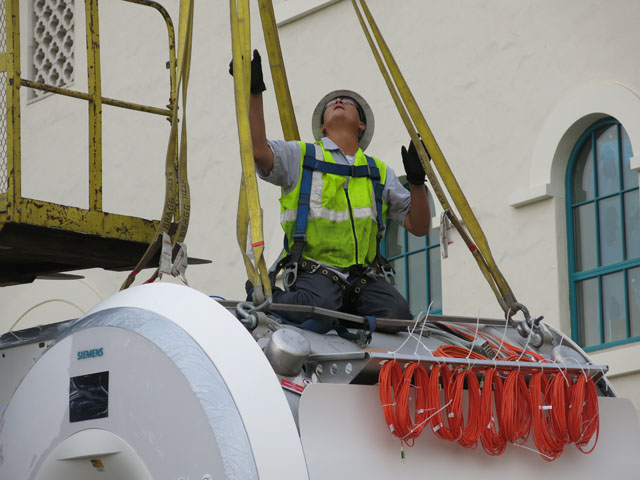
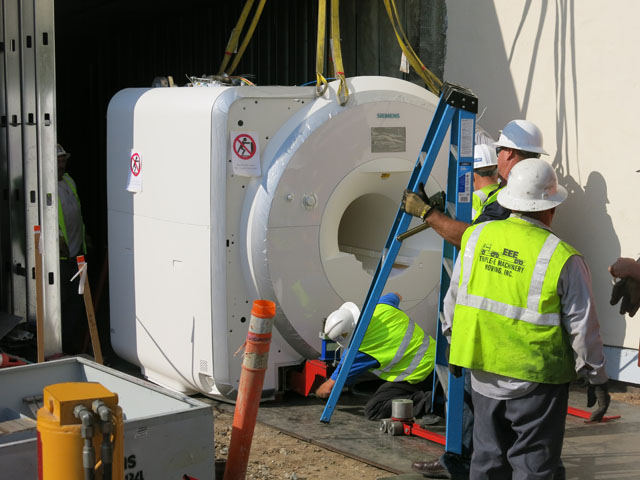
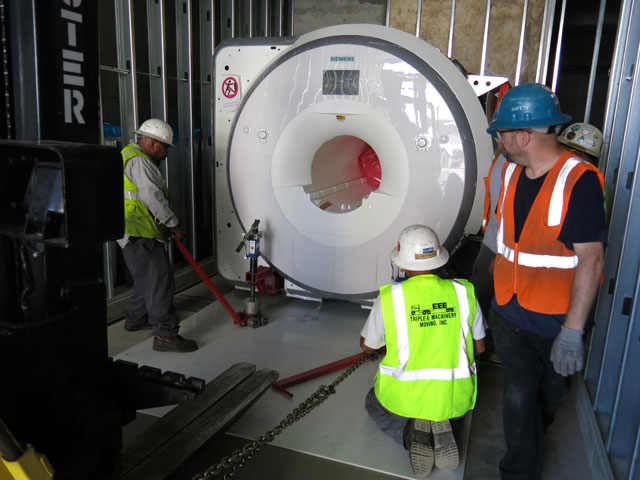
September 06, 2017 — Our (13 ton) Prisma arrives!
Here are some pictures of our new 13-ton Prisma being craned into the Engineering and Interdisciplinary Sciences building today. Some assembly is still required. The copper Faraday cage as well as tons of iron magnetic shielding will soon be wrapped around the magnet room as the Prisma is assembled, cooled down to almost absolute zero, brought up to field, and tested over the next month.
 Still wrapped
 Ready to lift (red optical data cables)
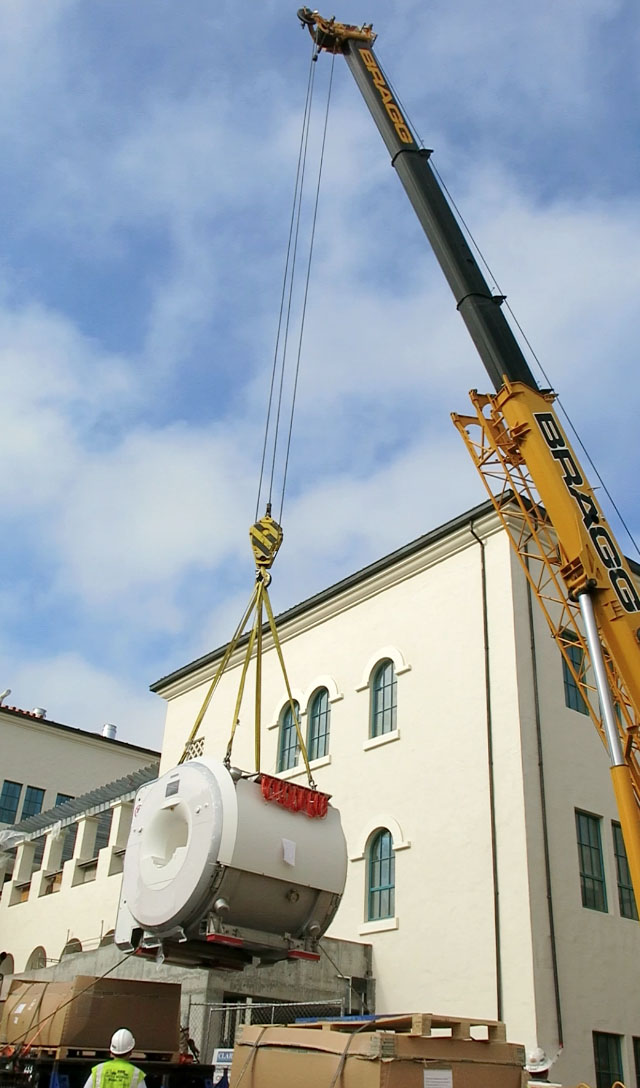 Up it goes
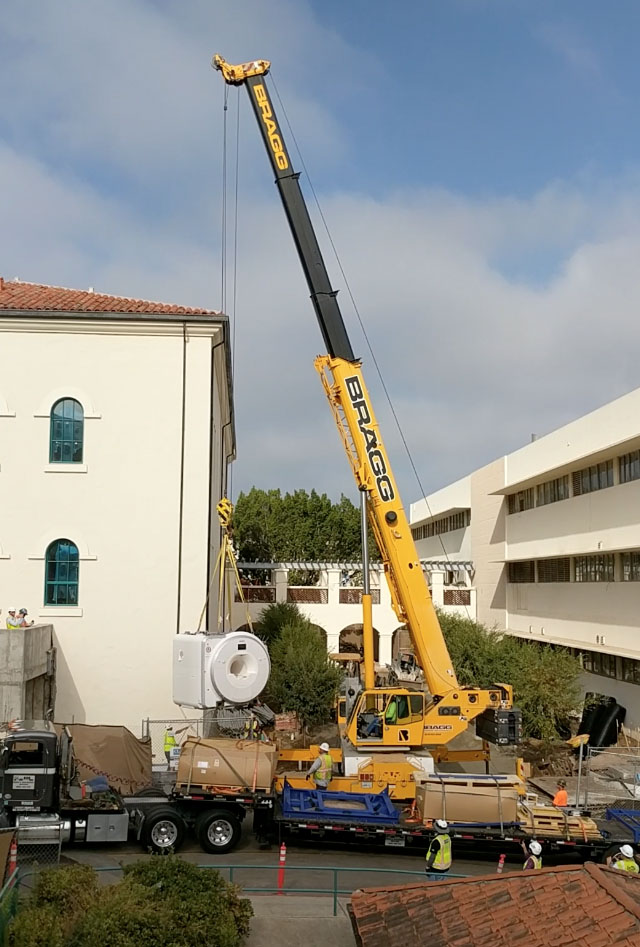 Almost there
 Onto rollers over plexiglass
 Safely down a ramp with the help of a forklift
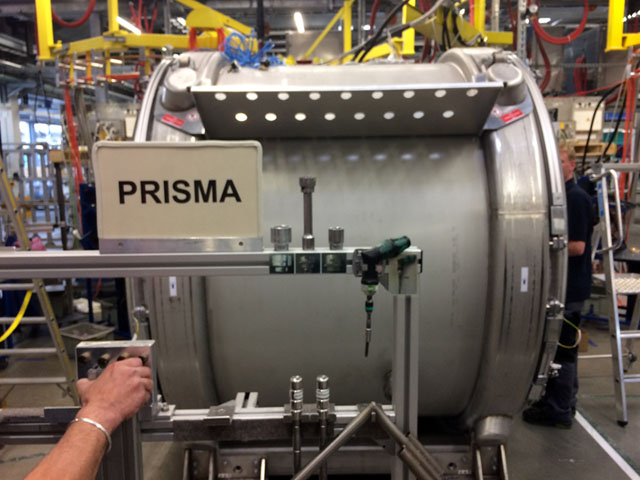
August 30, 2017 — Our Prisma ready to be shipped!
Outreach Letter from the Director
Hi all
I arrived at SDSU last Fall to help plan and direct the new which will be sited in the new Engineeering and Interdisciplinary Science Building (EIS) on campus. The installation of our new Siemens Prisma 3T will begin early this September. The center should open for business for the San Diego neuroimaging community in early-mid 2018.
I wanted to reach out to all of you who might have an interest in the new MRI imaging center, so apologies in advance for overreach, and definitely feel free to forward this to any possible interested party.
We are planning a lunchtime meet and greet town hall meeting in September (details available soon).
One major research audience for the new magnet are people interested in imaging the brain with one or more of the different available MRI imaging modalities, including:
structural imaging (e.g., quantitative T1 imaging)
blood oxygen level detection (BOLD functional MRI, fMRI)
tissue blood perfusion (arterial spin labeling, ASL)
white/gray matter fiber direction detection (diffusion tensor imaging, DTi)
magnetic susceptibility-weighted imaging
hydrogen spectroscopy (‘chemical shift’ imaging)
I am particularly interested in finding out the kinds of stimulus and responses devices that different groups of people will be needing. Among other things, we have plans to set up both front and back projection for visual stimuli (including direct-view VR wide-field), eye tracking, high fidelity scanner-noise-cancelling audio presentation and recording, multichannel air puff stimulation, olfactory stimulation, bimanual responses, bore and hand cams, and possibly prospective video-based motion correction (new KinetiCor) as well as EEG-in-the-magnet.
But we will also have coils and sequences for imaging other neural and non-neural parts of the body. For example, it is possible to do midsagittal imaging of the speech articulators at reasonable frame rates using sequences originally designed for dynamic imaging of the heart. We will also have a spine coil as well as wrap coils.
We are planning to obtain research access to the magnet software environment in order to be able to design and compile new pulse and image processing sequences as well as to install and use those from other MRI centers. The development of new MRI pulse sequences is a very active research area — MRI is ‘not done yet’.
Another area of active development in neuroimaging is software for analyzing structural and functional MRI data. There are many freely available well-suported software packages (e.g., AFNI, FreeSurfer, FSL, SPM); but neuroimaging is a fertile field for newly introduced big data learning and inverse methods and GPU image processing.
MRI neuroimaging can be combined with other modalities (for example, EEG [mentioned above], TMS, tDCS, ultrasound, separately recorded MEG). This is another area of active development.
Inert samples can be scanned for longer periods (e.g., overnight) to increase resolution. This competes with more traditional histological techniques because of better geometry preservation.
Non-biological samples such as wet sediment cores can also be scanned. For best resolution, specialized RF coils can be constructed to get as close to the sample as possible.
Finally, given the large number of magnets worldwide, there is a substantial market for new devices that can be used to deliver sensory stimuli in the magnet (visual, auditory, somatosensory, pain, olfactory, taste), directly stimulate the brain (TMS, tDCS), record record participant responses (manual, pedal, oral, vocal, GSR, EEG, eye tracking), or extend the magnet hardware (higher resolution RF coil arrays, baby RF coils, fixed tissue RF coils).
The most important requirement — beyond an exciting new concept for a device — is having an accessible, engineer-friendly magnet for prototyping and verification. The challenging MRI environment (magnetic fields, high-power RF, requirement for low RF emission to avoid imaging artifacts) is virtually impossible to simulate and verify without an actual magnet on hand.
After safety training (the big scanner magnetic field is always on, even when the power goes off…), we will train you to operate the scanner yourself. Each new scanning project will begin with a brief (4 min) public project proposal presentation to give us a chance to help you refine it, to build our local imaging community, and to give researchers new to the technology a chance to see how it is done.
Once there has been time to submit and obtain grant funding for imaging studies at our new center, we will be charging users the standard hourly fee for scan time. In order to give researchers time to obtain preliminary data, and to submit and obtain grants sited at SDSU, for a limited time, we will offer heavily discounted scan time. I will be teaching a Foundations of Neuroimaging course (PSY 596) this Fall that will use the SDSU Learning Glass lecture recording system.
Finally, feel free to contact me with any possible query, request, or interest you may have.
Cheers,
Marty Sereno
Director SDSU MRI Imaging Center
msereno@sdsu.edu